Data Table Management
The Data Table Settings feature allows you to create and customize additional data fields within modules such as Job Card, Object, Partner, or other records.
Using this feature, you can extend the system with custom fields tailored to your business workflow (e.g., Odometer mileage, Fuel level, Accessories, Replacement vehicle, etc.).
Custom fields appear in the Data tab of the selected module.
Where to Access Data Table Settings
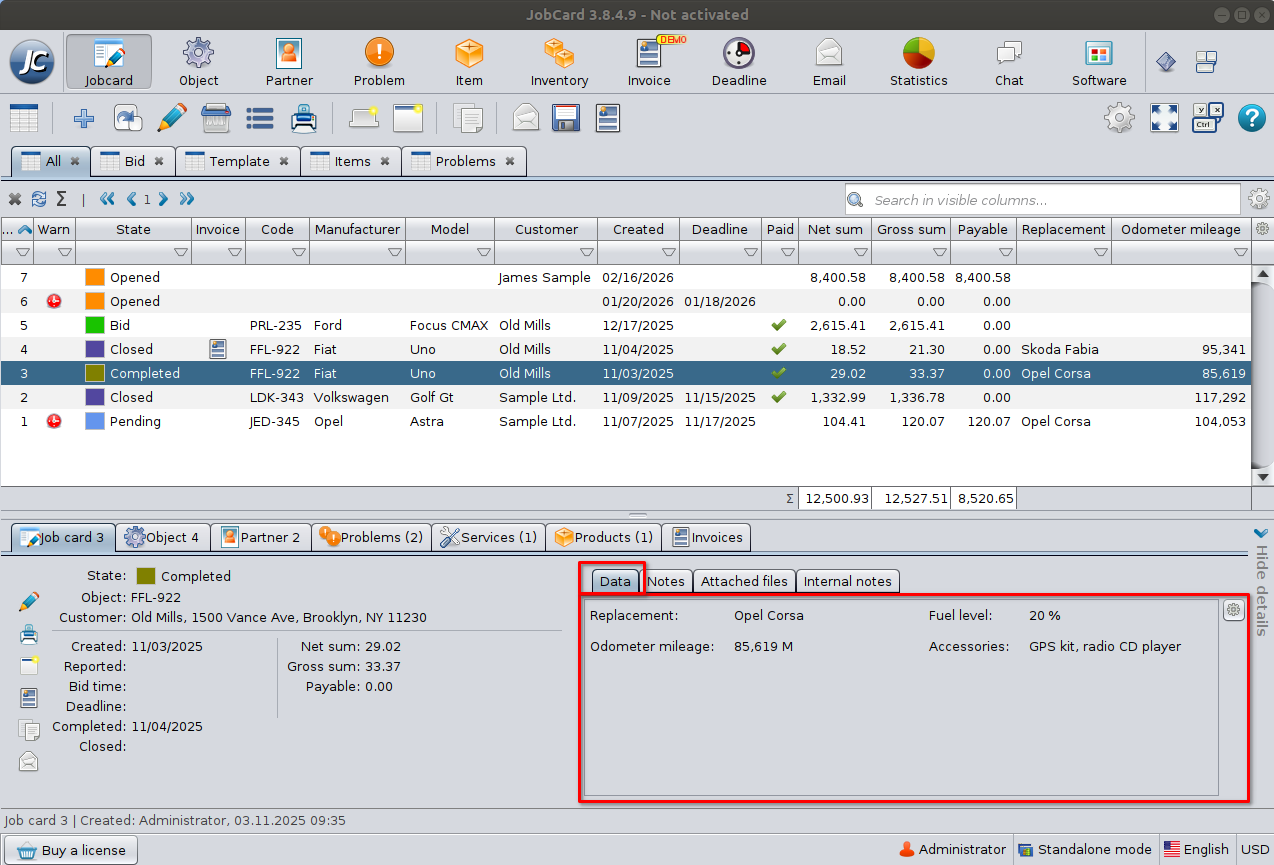
- Open the desired module (e.g., Job Card).
- Go to the Data tab.
- Click the settings (gear) icon in the top-right corner.
- Select Edit data table…
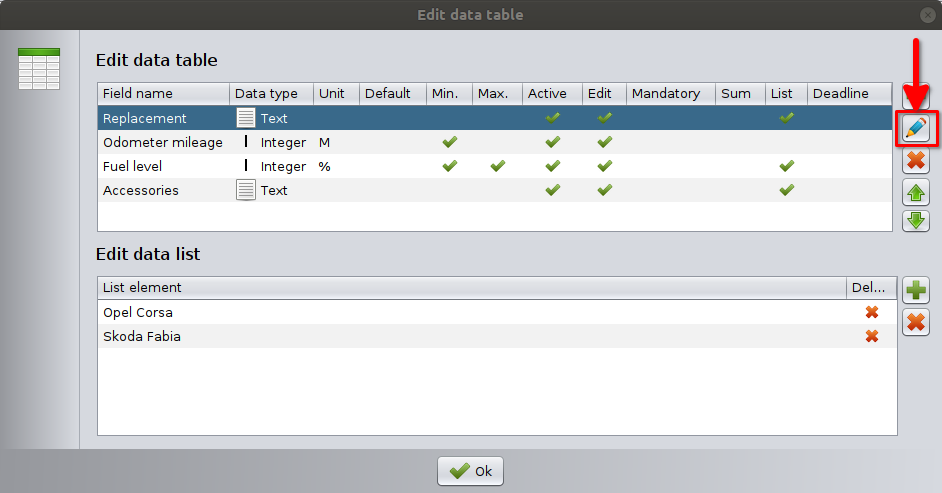
This opens the Edit Data Table window.
Edit Data Table Window
The Edit Data Table window allows you to:
- Add new fields
- Modify existing fields
- Set field behavior
- Reorder fields
- Define value lists (if applicable)
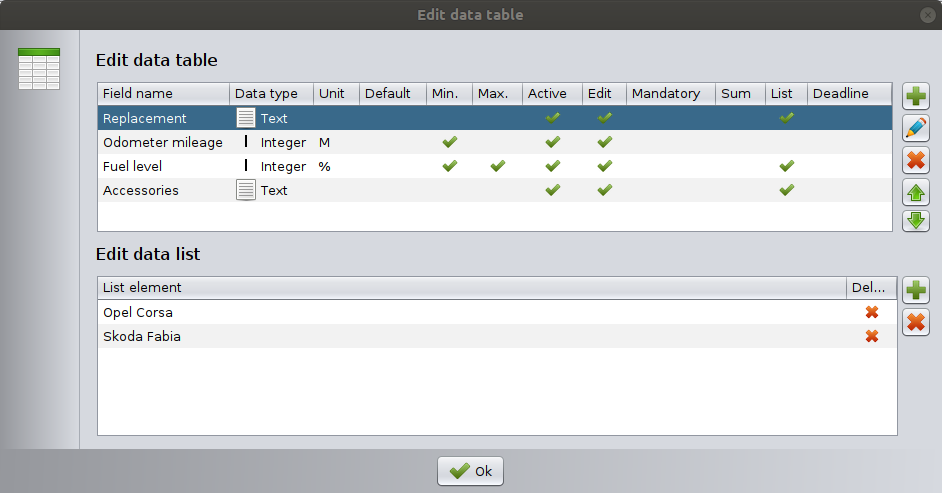
Field Overview Columns
Each row in the table represents a data field.
Columns include:
- Field name – The label shown in the Data tab.
- Data type – Type of data stored.
- Unit – Optional measurement unit.
- Default – Default value.
- Min / Max – Minimum and maximum allowed values (numeric fields).
- Active – Field is visible.
- Edit – Field can be edited.
- Mandatory – Field must be filled in.
- Sum – Included in summary calculation.
- List – Uses predefined value list.
- Deadline – Date field can auto-calculate deadlines.
Adding a New Data Field
Click the Add (+) button to open the Add new data field window.
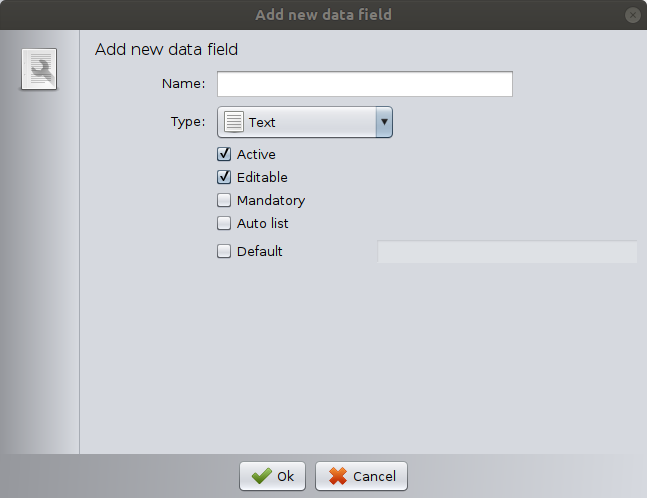
Required Settings
- Name
Enter the field label (for example: Fuel level). - Type
Select the data type (see below).
⚠️ The data type of a created field cannot be modified later. Always determine the data type carefully before saving.
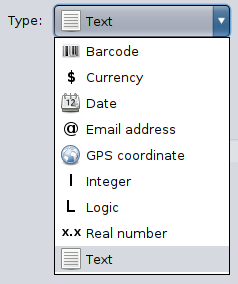
Available Data Types
Barcode

Stores barcode values.
Use for:
- Equipment identification
- Serial tracking
Currency
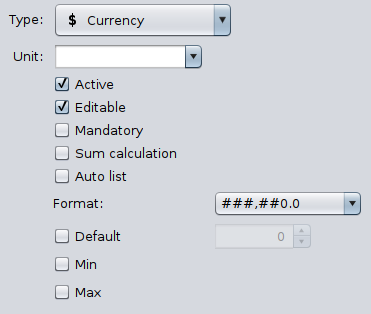
Monetary values.
Options:
- Unit (currency symbol)
- Format
- Min / Max
- Sum calculation
- Default value
Use for:
- Additional charges
- Custom costs
Date
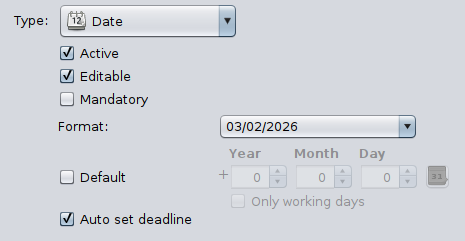
Calendar date selection.
Options:
- Format
- Default date: For date fields, you can define a relative default value, such as “+8 days from today.”
- Auto set deadline
- Only working days
Use for:
- Service reminders
- Warranty expiration
- Follow-up dates
Email Address
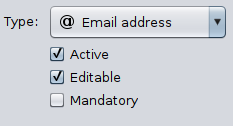
Validates email format.
Use for:
- Contact emails
- Notification addresses
GPS Coordinate
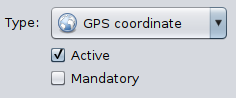
Stores geographic coordinates.
Use for:
- Location tracking
- Asset positioning
Integer
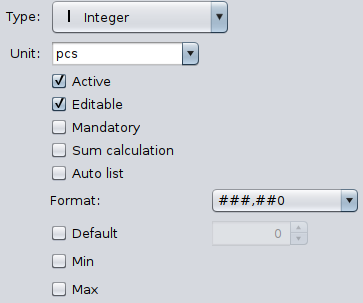
Whole numbers only.
Options:
- Unit (e.g., km, pcs, %)
- Min / Max value
- Sum calculation
- Default value
Use for:
- Mileage
- Quantity
- Percentage
Logic
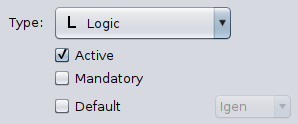
Boolean value (Yes / No).
Use for:
- Checkboxes
- Condition flags
- Inspection passed
Real Number
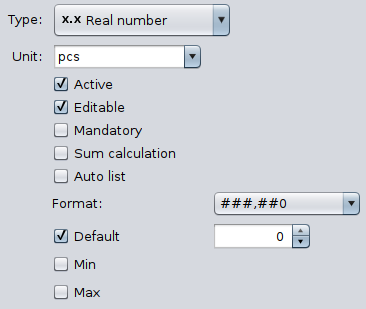
Decimal numbers allowed.
Options:
- Unit
- Format
- Min / Max
- Sum calculation
- Default value
Use for:
- Measurements
- Precision values
- Technical parameters
Text
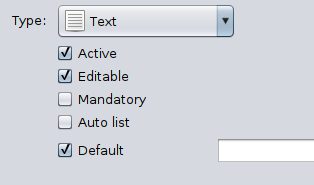
Free text input.
Options:
- Active
- Editable
- Mandatory
- Auto list (stores entered values as suggestions)
- Default value
Use for:
- Notes
- Accessories
- Descriptions
Editing an Existing Field
Select the field and click the Edit (pencil) button.
You can modify:
- Name
- Data type settings
- Default values
- Validation limits
⚠️ The data type of a created field cannot be modified later. Always determine the data type carefully before saving.
Using Value Lists
If Auto list is enabled, the system will automatically build a dropdown list from previously entered values so you don’t have to type the same value again manually.
You can also manually manage list elements in the Edit data list section:
- Add list element (+)
- Remove element (X)
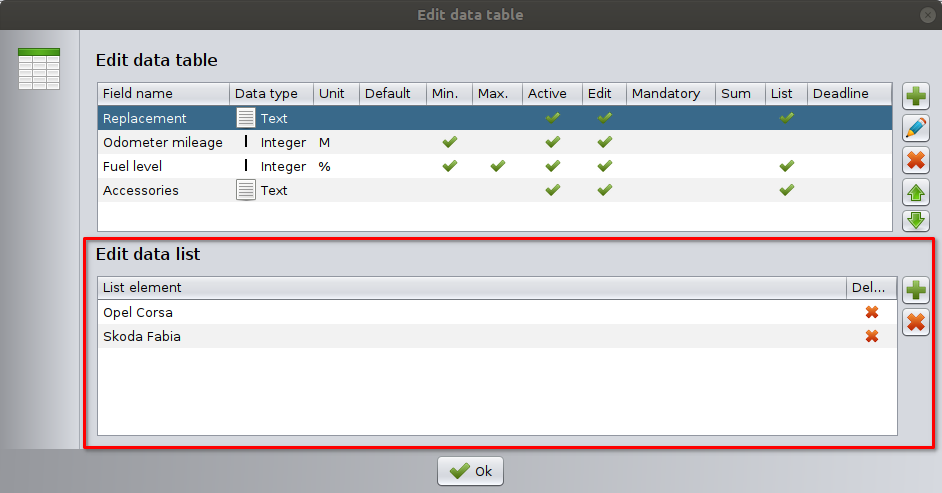
This is useful for:
- Replacement vehicles
- Common accessory packages
- Standard service types
Field Behavior Options
Active
If disabled, the field is hidden.
Editable
If the data field is editable, the user can enter any value freely.
If it is not editable, the user can only select a value from the predefined list.
Mandatory
User must enter a value before saving the record.
Sum calculation
Field is included in module summary totals.
Min / Max
Defines allowed numeric range.
Default
Pre-filled value when creating a new record.
Default date
For date fields, you can define a relative default value, such as “+8 days from today.”
Auto set deadline (Date fields only)
Automatically sets a deadline for the entered date
Reordering Fields
Use the Up / Down arrows to change field order.
The order determines how fields appear in the Data tab.
Warning: Deleting Data Fields
⚠️ Deleting a data field permanently removes not only the field definition but also all stored data in that column across existing records.
⚠️ This action cannot be undone.
For this reason, data field deletion should only be performed by authorized users who fully understand the consequences.
How Fields Appear in the Module
After saving:
- Click on a record.
- Go to the Data tab.
- Custom fields are displayed in the defined order.
Example:
- Replacement
- Odometer mileage
- Fuel level
- Accessories
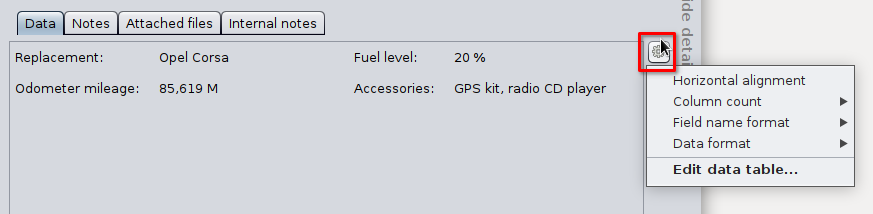
Formatting and Appearance Options
In addition to editing fields, you can customize how the Data tab is displayed.
Note: This affects only how values are shown, not the stored data type.
To access appearance settings:
- Select a record (e.g., Job Card).
- Go to the Data tab.
- Click the gear (⚙) icon in the top-right corner.
- Choose one of the formatting options.
Horizontal Alignment
Defines how the content inside data fields is aligned.
Column Count
Defines how many columns are used to display the data fields in the Data tab.
- 1 column → vertical layout
- 2 columns → balanced layout
- Multiple columns → compact display
Increasing the column count makes better use of wide screens.
Field Name and Data Format
Controls how field labels (names) and field values are displayed.
This may affect:
- Font style
- Bold/normal display
- alignment
Useful for improving readability and emphasizing important fields.
Best Practices
- Use clear and short field names.
- Avoid creating too many unnecessary fields.
- Use numeric validation for technical data.
- Use Auto list for frequently repeated values.
- Keep field order logical and readable.
Important Notes
- Data table settings apply to the selected module only.
- Changes affect future records immediately.
- Existing records retain stored values.
- Deleting a data field permanently removes not only the field definition but also all stored data in that column across existing records.
- In server–client mode, table structure is shared across users.