Users & Privileges
The Users and Privileges feature allows you to manage who can access the application and what each person is allowed to do. You can register multiple users, assign passwords, and control their access rights to different parts of the software.
⚠ Note: Users & Privileges function is available only in our version 3 products (JobCard 3, InventoryManager 3, TireHotel 3, Freight 3, InvoicePad 3, CustomerRegister 3, CashRegister 3).
Why Register Users?
Using separate user accounts is beneficial because:
- You can control which features each user is allowed to access.
- You can track who created or modified specific records.
- You can identify which user performed certain jobs.
- You can calculate commissions or performance-based rewards based on completed work.
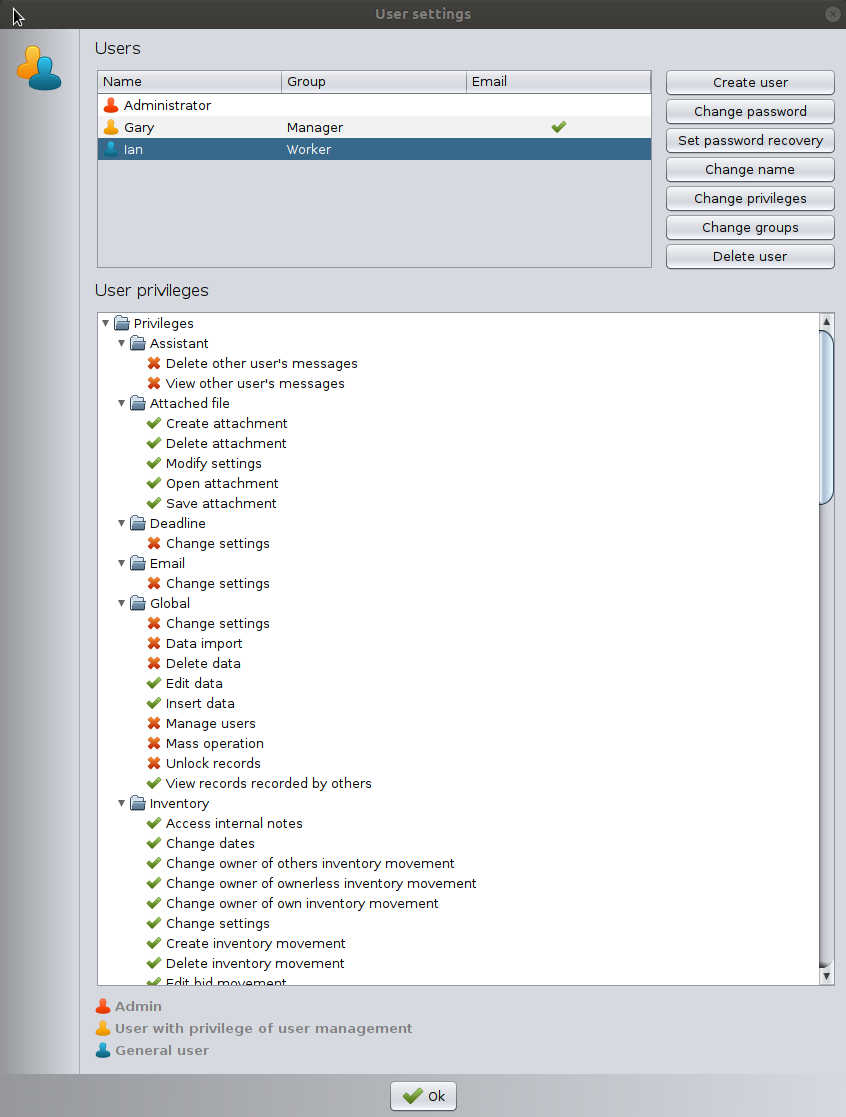
Types of Users
The system supports three main types of user accounts. Each type has a different color:
Administrator
- Has full access to every function in the software.
- Only one Administrator account can exist.
- The Administrator password is set during the first startup when the database is created.
- Only the Administrator can change this password.
- If the password is lost, support assistance is required to reset it.
Power User (user with privilage of user management)
- Has the right to manage users.
- Can create and delete users.
- Can change passwords for other users.
- Can modify user permissions.
- Multiple Power Users can exist.
General User
- Does not have user-management rights.
- Can access functions that the Administrator or Power Users have allowed for them.
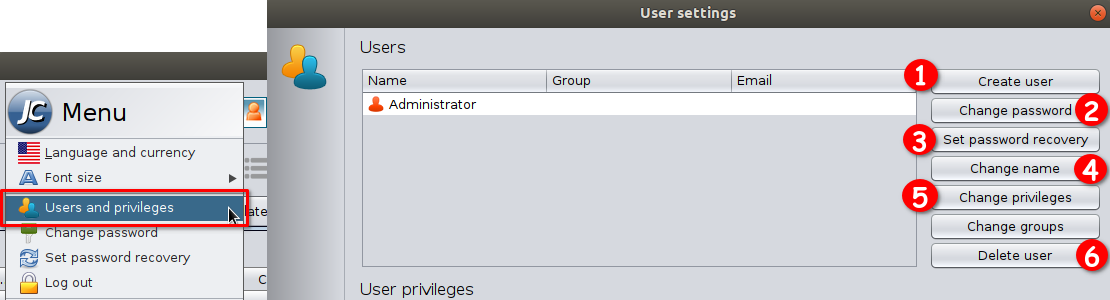
Managing Users
You can add, modify, or remove users from the Users and Privileges window. Open the Main Menu and select Users and privileges.
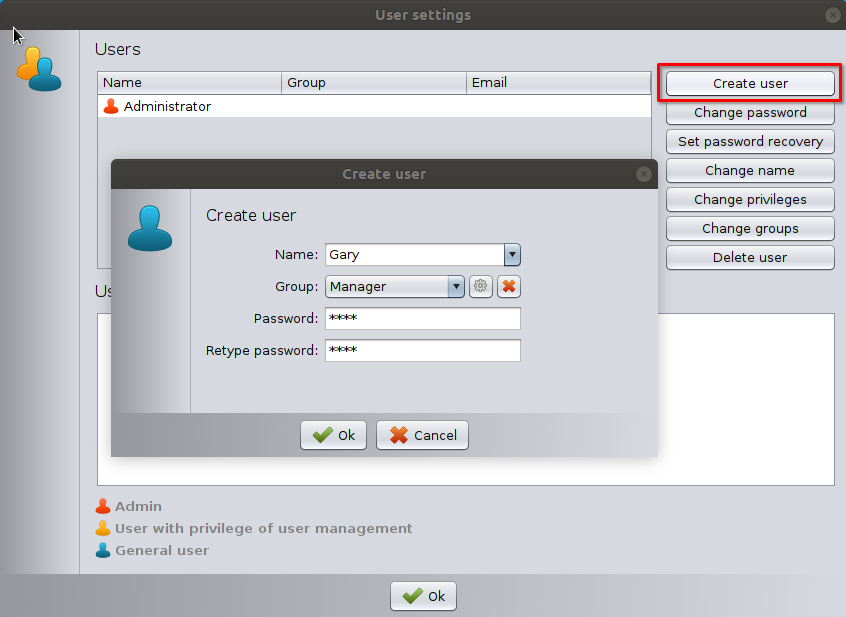
Adding a User
- Click Create user.
- Enter the user’s name.
- (Optional) Assign the user to a group to inherit all privileges of the group.
If you don’t assign the user to any group you can adjust permissions individually. - Create a password for the user.
- Confirm the password.
- Click OK to save.
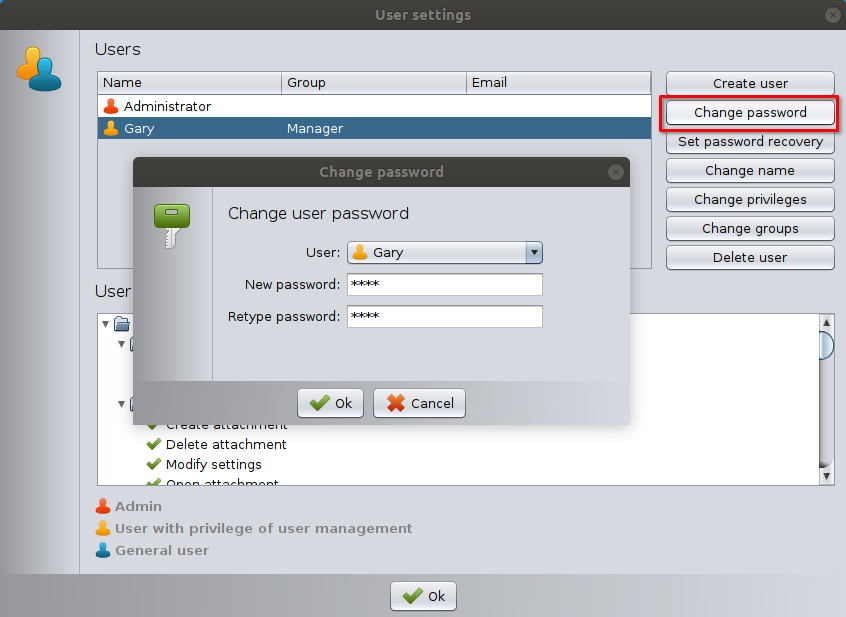
Changing a User’s Password
- Select the User.
- Click Change password.
- Enter the current password if prompted.
- Enter and confirm the new password.
- Click OK.
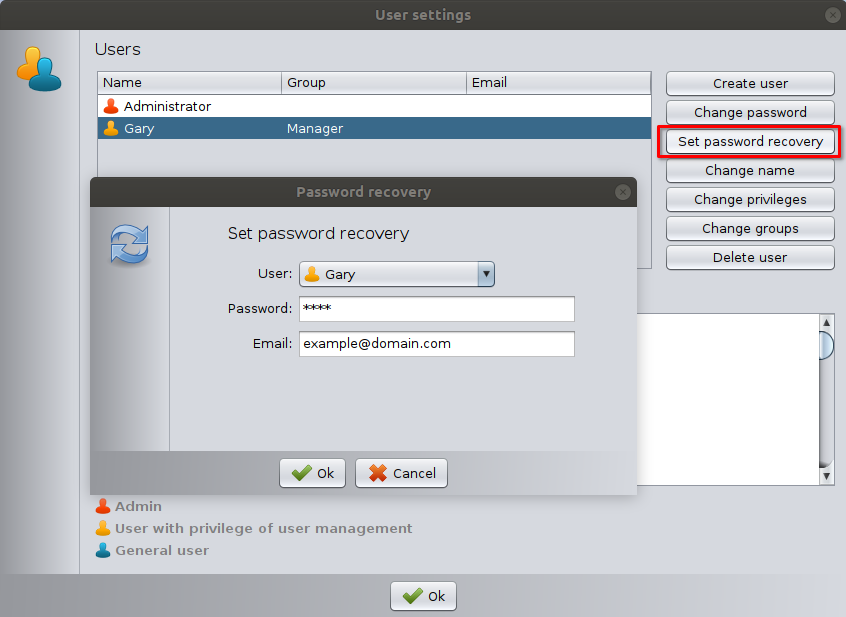
Password recovery
- Select the User.
- Click Set password recovery.
- Enter the User’s password.
- Enter the recovery email address.
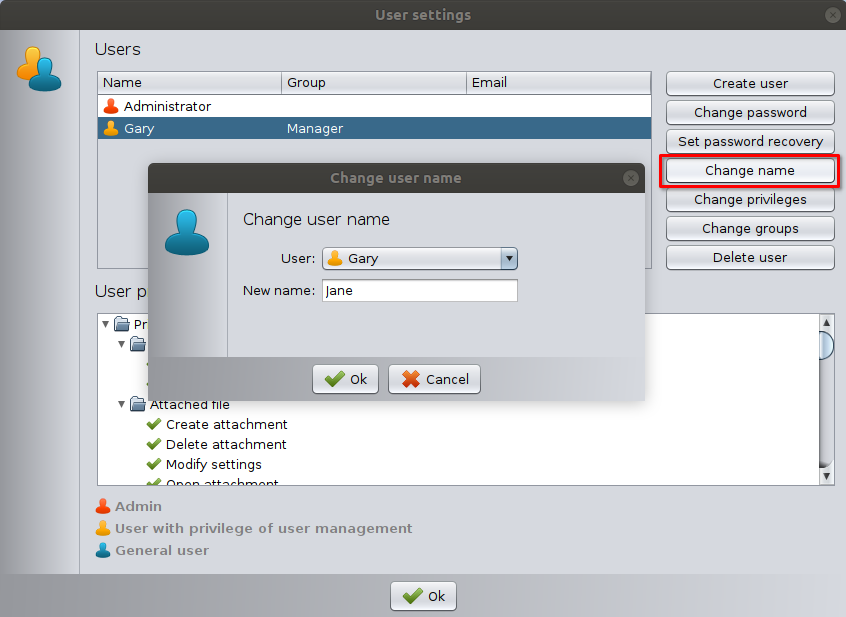
Changing a User’s Name
- Select the user (Administrator name cannot be changed).
- Click Change name.
- Enter the new name.
- Confirm with OK.
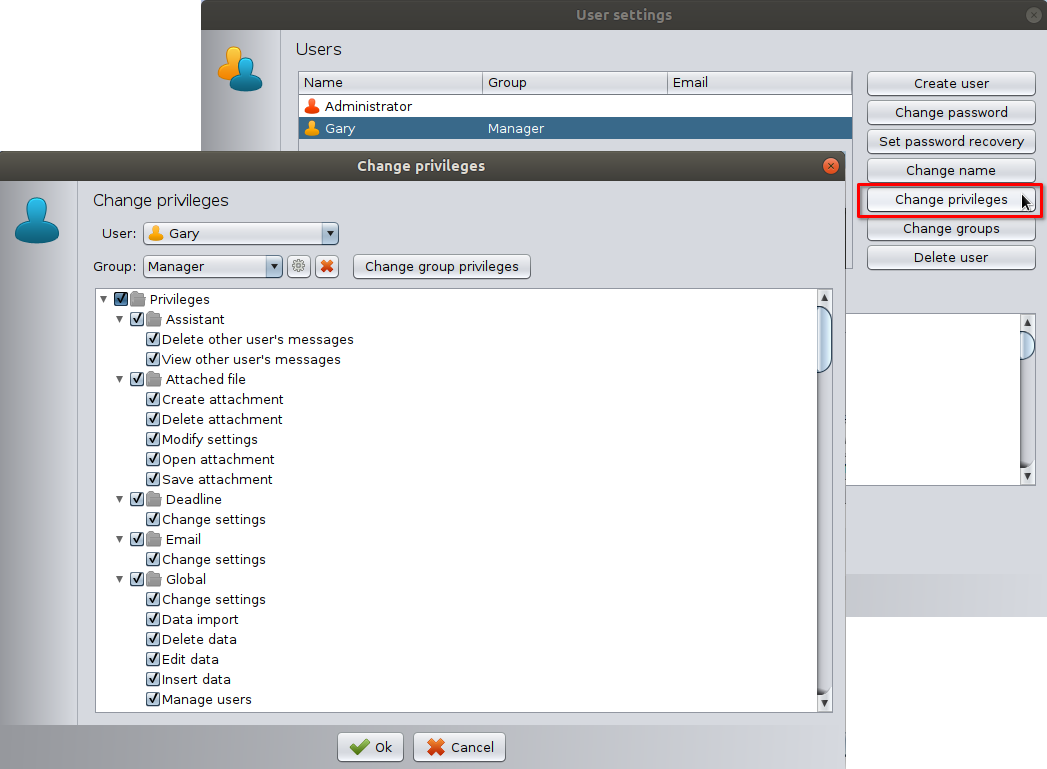
Modifying User Permissions
- Click Change privileges.
- Assign the user to a group or adjust permissions individually (if the user is not assigned to any group).
As an administrator you can modify the group privileges. Users inherit all permissions assigned to their group. - Click OK to save.
Deleting a User
- Select the user (Administrator cannot be deleted).
- Click Delete user.
- Confirm with OK.

User Groups
User groups allow you to control permissions for multiple users at once.
Users inherit all permissions assigned to their group, making permission management easier and more consistent.
Open Main Menu > Users and Privileges to access these settings.
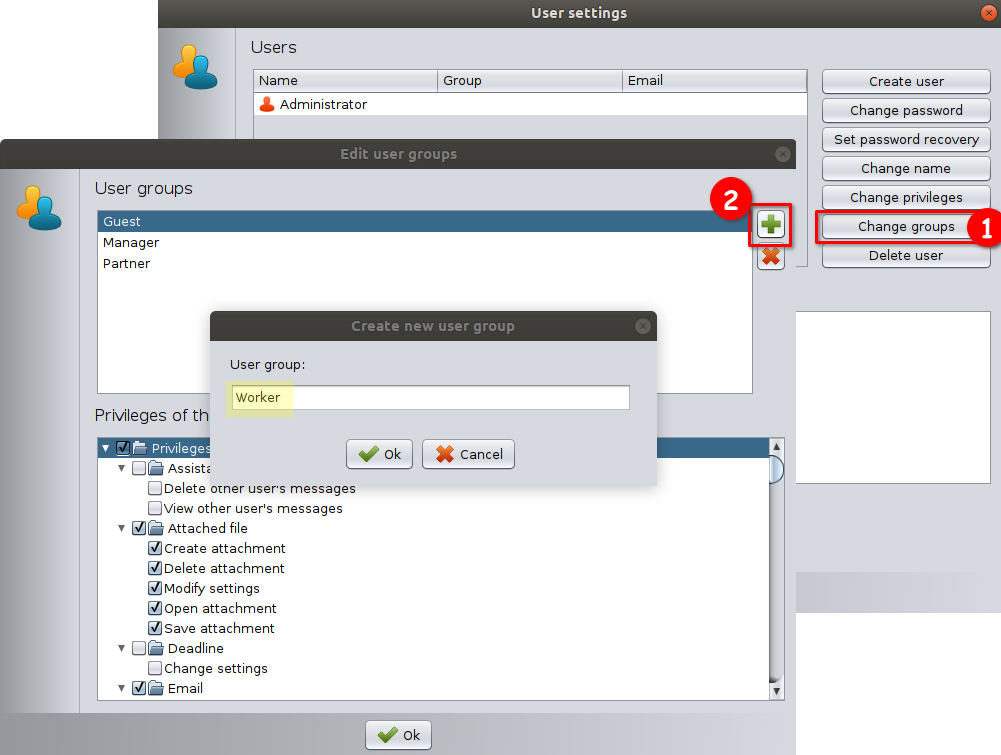
Adding a New Group
- Click Change Groups.
- Click Create new user group
- Enter a name for the group.
- Click OK.
- Set permissions as needed.
Deleting a Group
- Click Change Groups.
- Select the group.
- Click the red Delete button.
- Confirm with Yes.
Modifying Group Permissions
- Click Change Groups.
- Select the group.
- Adjust permissions by checking or unchecking items.
- Click OK.
Types of Permissions
Permissions control access to different areas of the system. They fall into three categories:
System Permissions
Affect overall software behavior (e.g., editing global settings).
Module Permissions
Control access to modules such as invoicing, inventory, job cards, cashier module, etc.
Other Permissions
Control detailed actions within modules (e.g., editing records, deleting items).
Each permission can be assigned either to individual users or inherited through user groups.