Logo and Signature Settings
The Images settings section allows you to manage images that appear on printed documents, such as company logos and signature images. These images are used to personalize printouts and make them suitable for official or customer-facing documents.
Accessing Images Settings
To view or change these settings:
- Open the Main Menu
- Go to Settings
- Select Images
This opens the Images settings window, where you can customize your printout logos and signature.
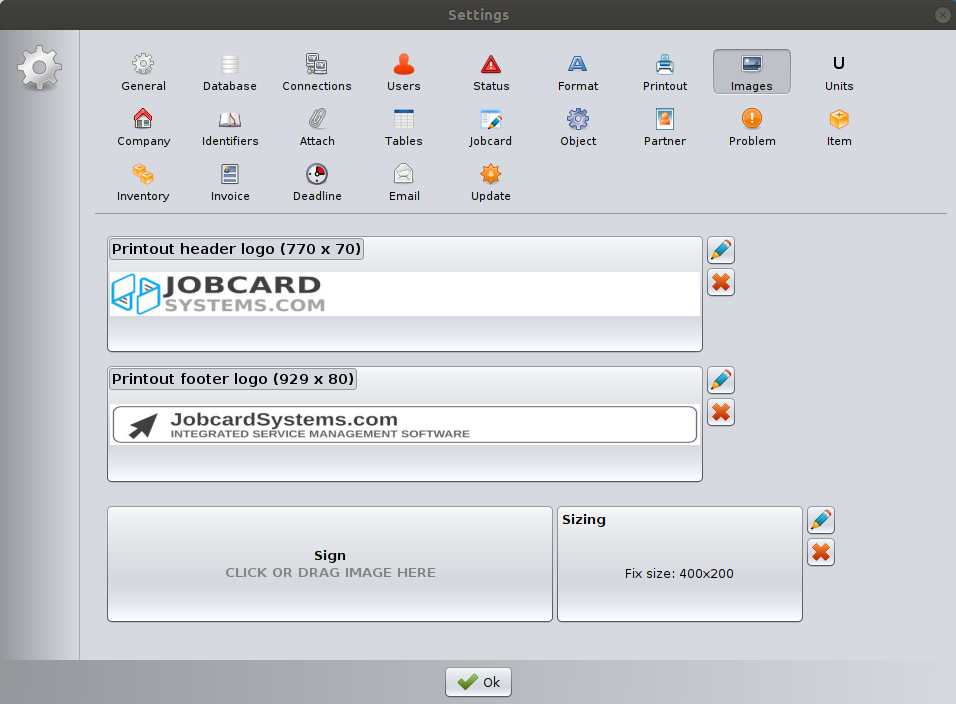
Printout Header Logo
This area defines the image displayed in the header of printed documents.
- The recommended image size is 770 × 70 pixels.
- The logo typically appears at the top of printouts such as job cards, warranty cards, and invoices.
- Using the recommended size ensures proper alignment and avoids distortion.
Edit and remove
- Click the edit (pencil) icon to select or replace the header logo.
- Click the delete (X) icon to remove the image.
Printout Footer Logo
This image appears in the footer section of printed documents.
- The recommended image size is 929 × 80 pixels.
- Footer logos are often used for branding, slogans, or company contact information.
Edit and remove
- Use the edit (pencil) icon to upload or replace the footer logo.
- Use the delete (X) icon to remove the image from the footer.
Signature Image
Sign
This section is used to store a signature image, which can be placed on printed documents.
- You can click the area to select an image file.
- You can also drag and drop an image directly into the field.
- This image is typically used for customer or company representative signatures.
Signature Image Size and Aspect Ratio
The optimal signature image size is
- 400 × 200 pixels.
If the uploaded image differs from this size, the software automatically resizes and crops the image to fit the required dimensions.
To ensure that the signature appears correctly on printed documents, it is important that the uploaded image has a 2:1 aspect ratio. Images with a different aspect ratio may be cropped, which can affect how the signature is displayed on printouts.
For best results, use a transparent or light background and ensure the signature is centered.
Saving Changes
Click OK to save all image settings and apply them to printouts.
Signature configuration from the Print Preview Window
When creating a Job Card printout, open the Print Preview window and click the Customize button.
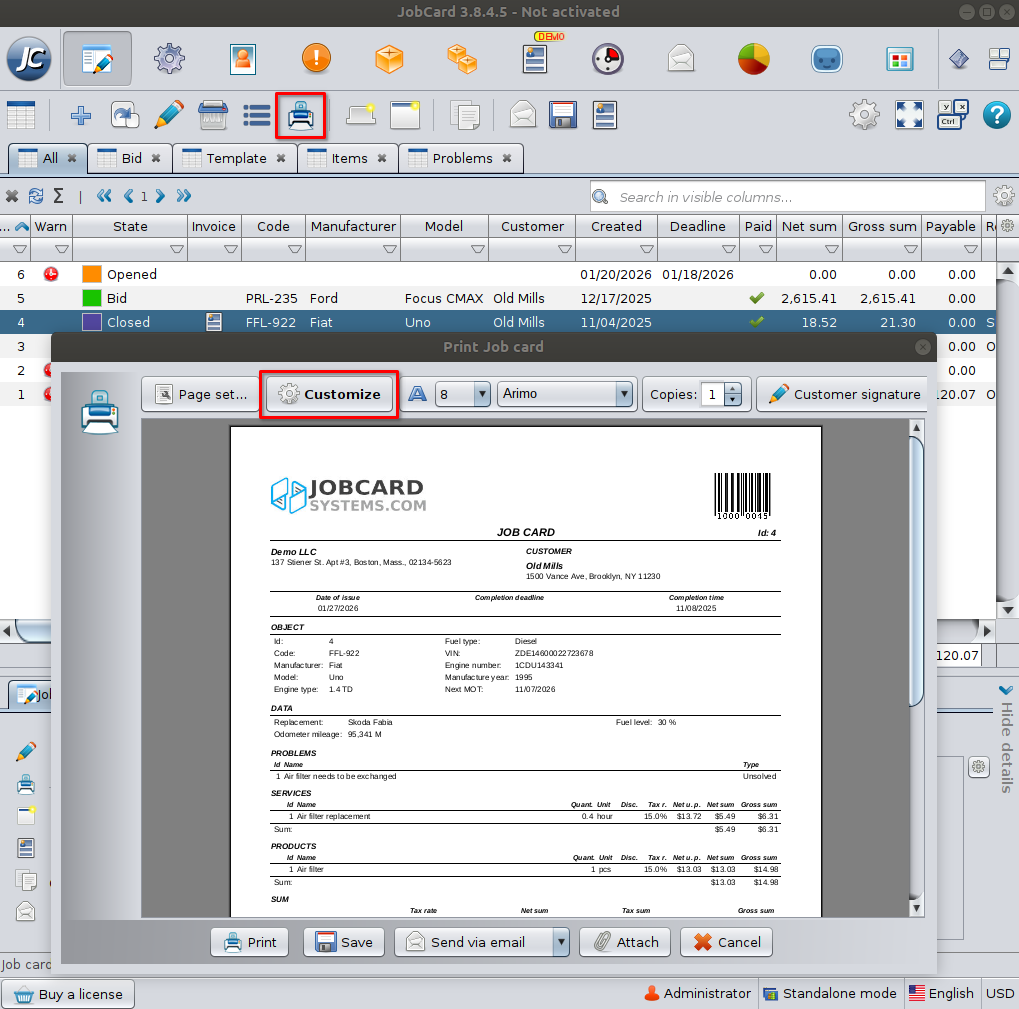
In the Printout Settings window, select Handover from the list on the left.
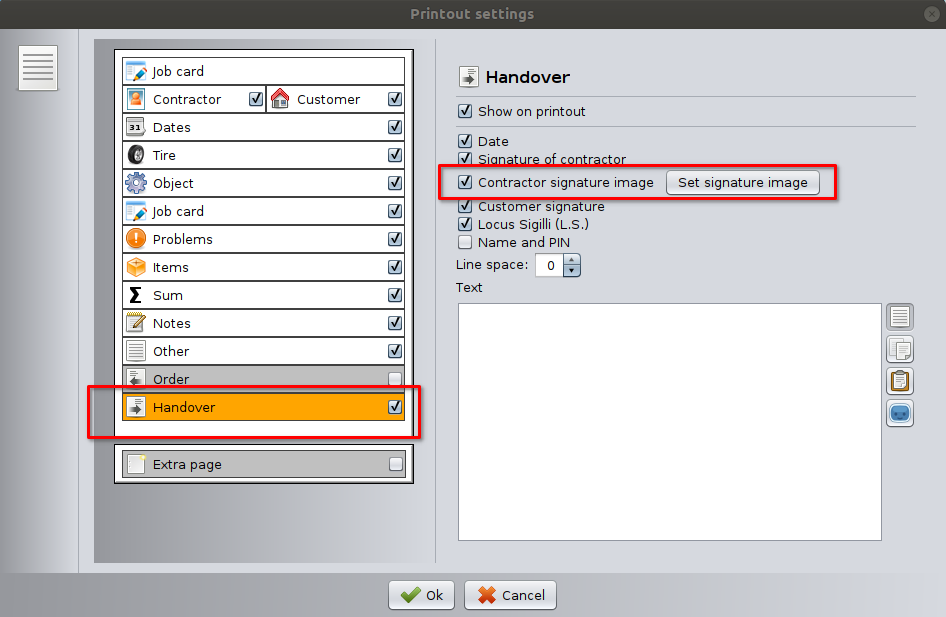
Here you can separately enable or disable the signature image, and by clicking Set signature image you can upload a new signature image or modify the existing one.
For Invoice printouts, the configuration process is similar. The difference is that the same options are located under the Signature section within the Printout Settings window.
Best Practices
- Use high-quality PNG or JPG images.
- Follow the recommended image sizes to avoid scaling issues.
- Keep logos simple and readable, especially for black-and-white printing.
- Test a printout after changing images to confirm correct placement.
Important Notes
- Image settings apply globally to all relevant printouts.
- Removing an image does not affect existing printed documents.
- Changes take effect immediately after saving.