Partner module
The Partner module is the central place for managing all business contacts, including customers, contractors, suppliers, and other organizations or individuals you work with.
To open the Partner module, click the Partner icon in the module selector located in the top toolbar.
Partner Module Overview
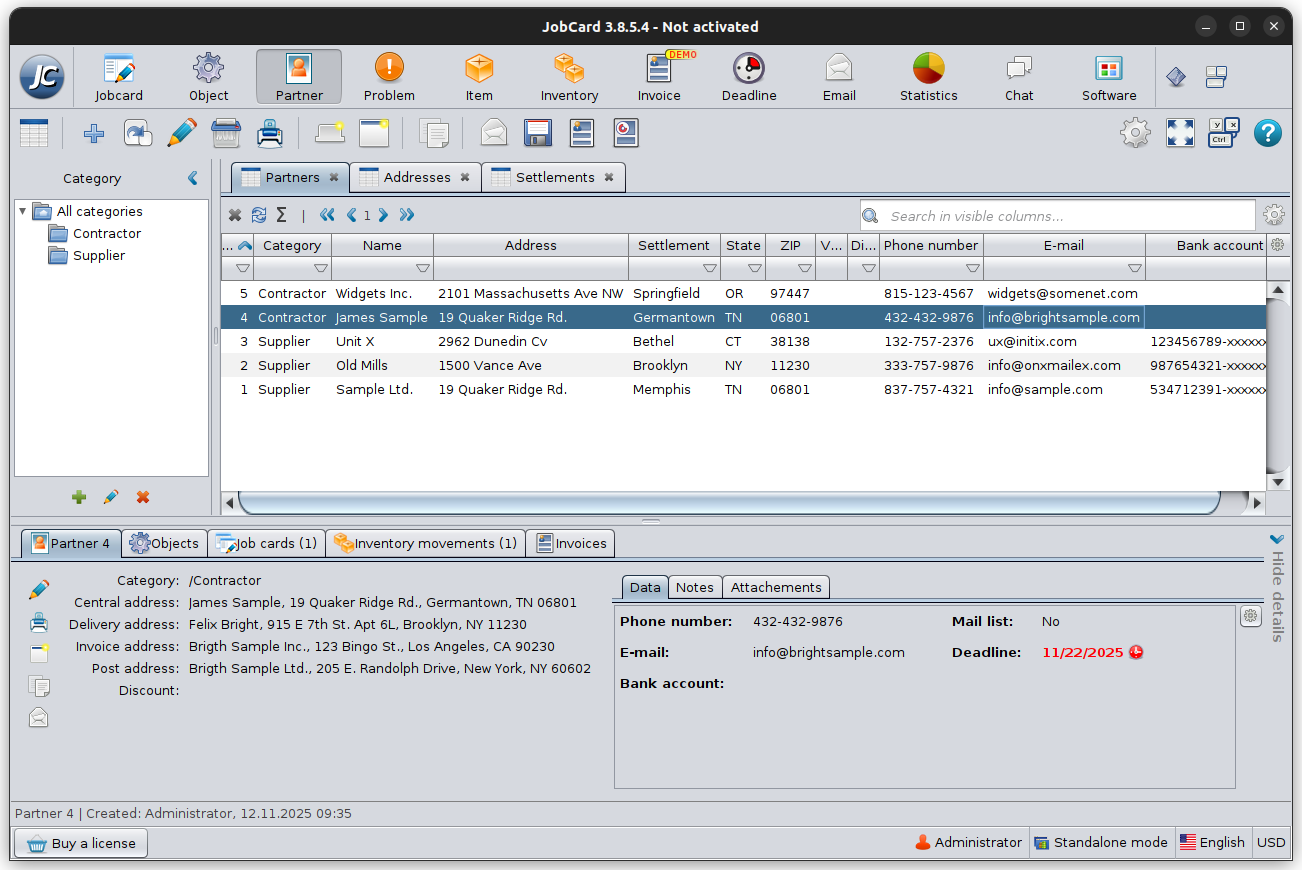
When you open the Partner module, the window is divided into four main areas, allowing you to browse, organize, and view partner information efficiently.
Category Panel
The panel on the left displays the partner categories.
Categories help organize your contacts into logical groups, for example:
- Contractor
- Supplier
- Customer
- Any custom categories you create
Selecting a category displays only the partners belonging to that category. Selecting All categories displays every partner in the database.
Categories can be created, renamed, or deleted to match your company’s workflow.
Partner List
The center of the window contains the partner list.
Each row represents one partner and displays important information such as:
- Category
- Name
- Address
- Settlement (City)
- State
- ZIP code
- Phone number
- E-mail address
- Bank account
The table supports sorting, filtering, and searching, allowing you to quickly locate any partner in the database. For detailed information about searching and filtering, see Working with Records.
Partner Details
The lower section displays detailed information about the currently selected partner.
This information is organized into several tabs:
- General information – Displays important contact and address information.
- Data – Shows custom data fields configured for the Partner module.
- Notes – Stores additional notes and comments.
- Attachments – Contains files and documents associated with the partner.
Whenever you select a different partner in the list, this section is automatically updated to display that partner’s information.
General Information
Displays the partner’s primary information, such as:
- Category
- Contact addresses
- Delivery address
- Invoice address
- Postal address
- Discount
The available fields may vary depending on your configuration.
Data
The Data tab displays custom data fields configured specifically for the Partner module.
These fields allow you to store additional information that is unique to your business.
Examples include:
- Phone number
- E-mail address
- Bank account
- Custom company-specific fields
The structure of this tab can be customized using Data Table Settings.
For more information, see Data Table Management.
Notes
Use the Notes tab to store additional information related to the partner.
Typical examples include:
- Internal comments
- Customer preferences
- Special instructions
- Communication history
Attachments
The Attachments tab allows you to store files related to the selected partner.
Examples include:
- Contracts
- Price lists
- Certificates
- Identification documents
- Images
For more information, see Attachment Settings.
Related Records
Partner records are integrated throughout the application.
Below the partner list is a series of tabs showing records related to the selected partner.
Depending on the installed modules, these may include:
- Objects
- Job cards
- Inventory movements
- Invoices
The number displayed in parentheses indicates how many related records exist for the selected partner.
Selecting one of these tabs allows you to quickly navigate to records connected to the current partner without performing another search.
Managing Partner Addresses
Creating a New Partner
To create a new partner, click the New button on the toolbar. The Edit Partner window will open, where you can enter the partner’s information.
Each partner can have multiple addresses for different business purposes. This allows you to keep billing, delivery, and postal information separate while maintaining a single partner record.
The address editor is divided into dedicated tabs:
- Central Address
- Invoice Address
- Postal Address
- Delivery Address
- Site
Each address can contain its own contact information and location details.
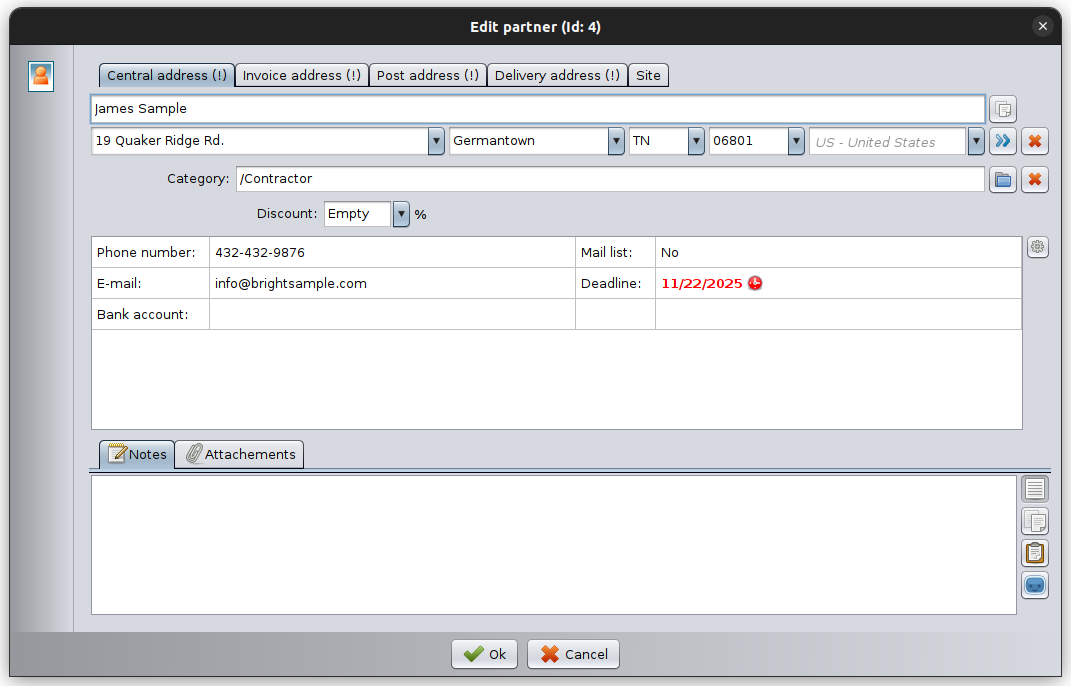
Central Address
The Central Address is the primary address of the partner and is used as the default business address throughout the software.
Typical information includes:
- Name
- Street
- Settlement
- State / Province
- ZIP / Postal code
- Country
This address is commonly displayed in lists and reports.
Invoice Address
The Invoice Address is used when generating invoices.
If the invoice should be issued to a different legal entity or location than the central address, enter the billing information here.
Postal Address
The Postal Address specifies where physical correspondence should be sent.
Use this address when the mailing address differs from the central or invoice address.
Delivery Address
The Delivery Address is the location where products or services are delivered.
This is particularly useful when deliveries are made to warehouses, branches, or customer sites rather than the company’s registered address.
Site
The Site tab stores an additional business location associated with the partner.
It can be used for:
- Customer premises
- Construction sites
- Service locations
- Branch offices
Copying Address Information
If several address types contain similar information, you do not need to enter the data repeatedly.
Click the Copy Address button next to an address to quickly copy the current address to:
- Invoice Address
- Postal Address
- Delivery Address
- Site
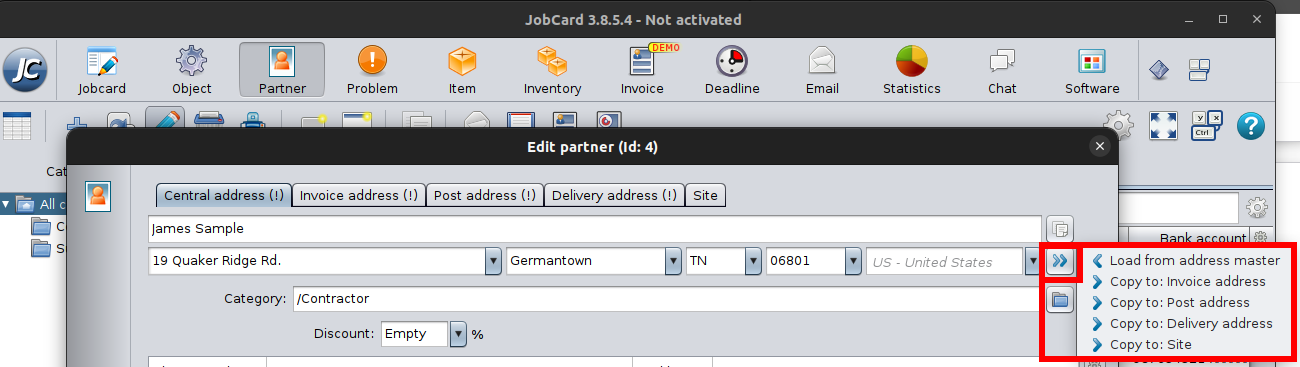
This significantly reduces data entry and helps maintain consistency.
You can also select Load from Address Master to choose an existing address from the Settlement database.
Additional Partner Information
Below the address section you can enter additional information about the partner.
Available fields include:
- Category
- Discount
- Phone number
- E-mail address
- Bank account
- Custom data fields
- Notes
- Attachments
The Data section can be customized using Data Table Settings, allowing you to store information specific to your business.
Addresses Table
The Addresses tab displays every address stored in the Partner module, regardless of its type. Each row represents a single address record associated with a partner, making it easy to search, filter, and manage address information across the entire database.
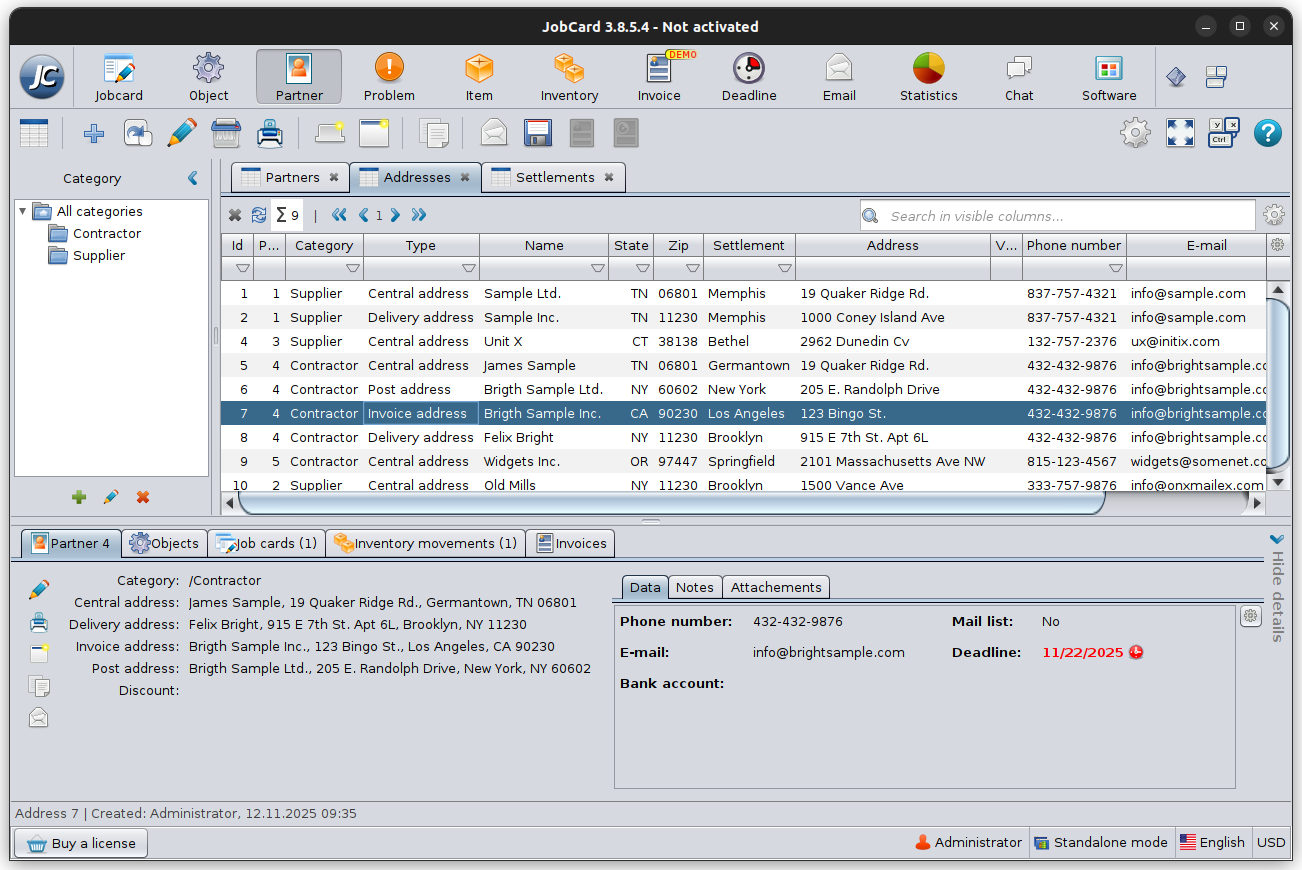
The table includes useful information such as:
- Partner category
- Address type (Central, Invoice, Postal, Delivery, or Site)
- Partner name
- State / Province
- ZIP / Postal code
- Settlement
- Street address
- Phone number
- E-mail address
Unlike the Partners tab, where each partner appears only once, the Addresses tab lists each address separately. For example, if a partner has a Central Address, Invoice Address, and Delivery Address, all three will appear as individual records.
This view is particularly useful when you need to:
- Find a specific address quickly.
- Search for all addresses in a particular city or ZIP code.
- Review invoice or delivery addresses across all partners.
- Export or print address information.
Selecting an address automatically displays the corresponding partner details in the lower section of the window, allowing you to easily identify the owner of the selected address.
Settlement Master
The Settlements tab contains the list of cities and settlements used throughout the application.
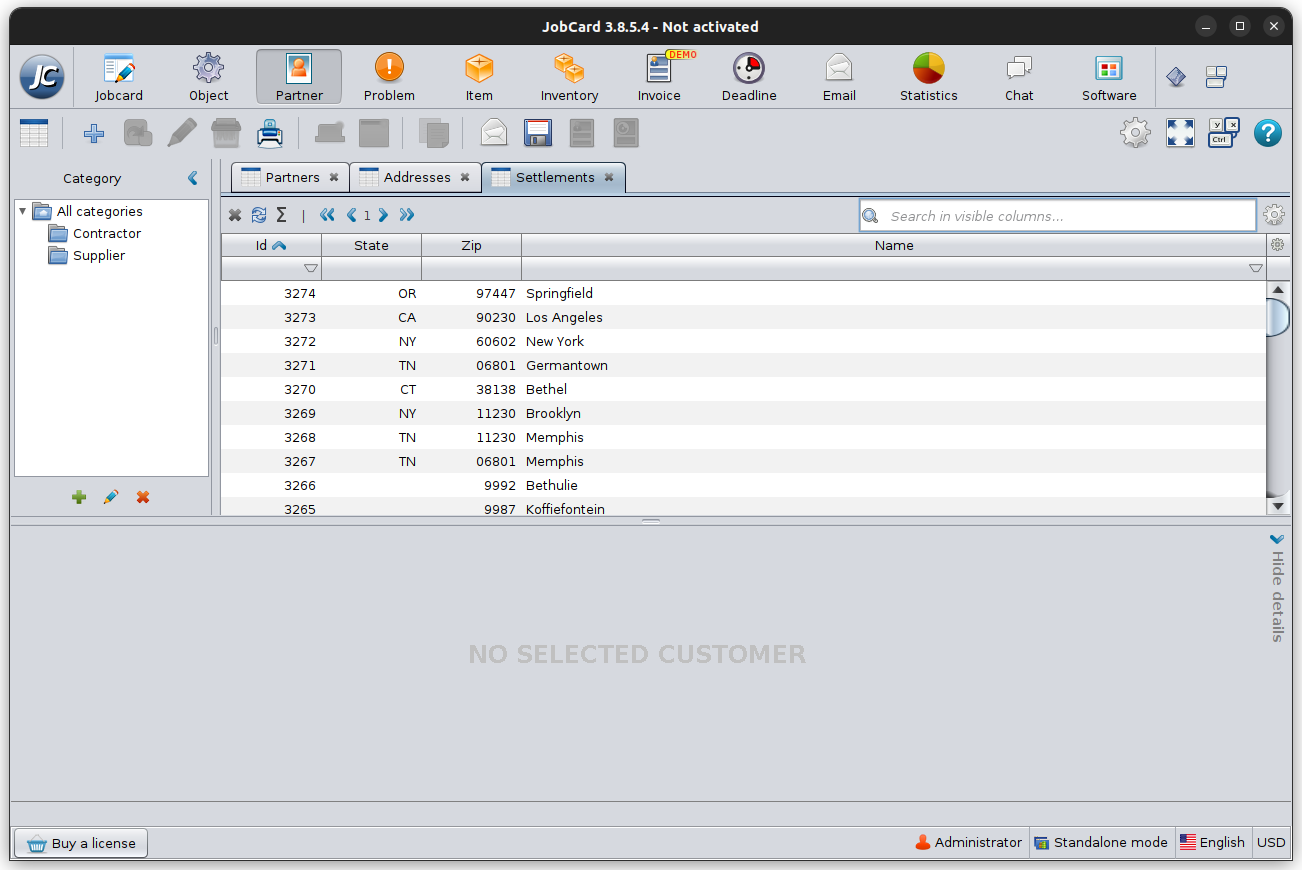
Instead of manually typing settlement names each time, the software stores them in a central database, ensuring consistent spelling and reducing duplicate entries.
Each settlement record contains:
- Settlement name
- State / Province
- ZIP / Postal code
All modules that require address information use this common settlement list.
Creating a New Settlement
If the required settlement does not already exist, you can create it directly from the Settlements tab.
To add a new settlement:
- Open the Settlements tab.
- Click New (+).
- Enter:
- Settlement name
- State / Province
- ZIP / Postal code
- Click OK to save.
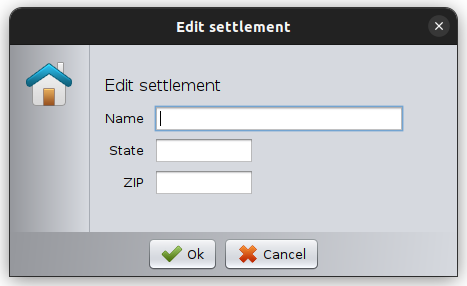
The new settlement immediately becomes available in every address field throughout the application.
Using the Settlement List
When entering a partner address, simply select an existing settlement from the drop-down list.
Using the settlement list provides several benefits:
- Faster data entry
- Consistent spelling
- Automatic ZIP and state information
- Fewer duplicate locations
This centralized approach improves data quality across the entire database.